Wednesday, December 16, 2009

Bigz Fancy Favor Box

In the continued spirit of using what I already have, I dug through my supplies for Designer Series Christmas Paper leftover from last year. I also had more of the felt stars left from a card I designed last year that matched the paper, which I also used on the box I featured on my blog last week. This color scheme is unorthodox for most Christmas packaging but I liked the idea of using an unusual color combination. In putting these together as gifts for my upcoming stamp club, I ended up using all but two sheets of the leftover DSP, which I'll use to put together some cards.
Here's the favor box from a different angle so that you can see a few more details. The box is a cinch to put together using the Big Shot Bigz Fancy Favor Box die. The accordion medallion is the most difficult aspect of the project but worth the extra time. I also made things easier on myself by adapting the design I used on the other box last week...I'm saving my creative juices for other projects :)

Love the glitter! My projects have been all about bling lately and this fine glitter certainly adds a bit of sparkle. I hope this sparks some creativity of your own and perhaps encourages you to dig through your own horde (you know you have one!) and be inspired with what you have already.


Friday, December 11, 2009

An Udderly Fabulous Christmas

If you are visiting my blog then you can probably sense that I have a love for cows :) Over the years, people have given me cow gift items that I love but some just strike a special place in my heart: the needlepoint cow picture my friend Tamela made me, the Cow in Converse candleholder from my sisters-in-law, the mooing cow clock from my in-laws, the cow carved out of Dove soap from Joe's mom, the sterling silver cow earrings from my grandma, the mooing cow cookie jar from my friend Dawn, or the mooing key chain with the flashlight eyes from my friend Missy are all kitschy, unique, fun cow gifts that give me a laugh and bring special people to mind. (trust me, there's more but I'd be here all day listing them all!) My friend Marilyn has embraced my love for cows and has made this udderly fabulous (forgive me, I just had to say that) cow Christmas tree for me this year. Every little detail is just perfect, from the adorable "Moo" tags to the cow figurines placed all over the tree.I love the glittery ornaments and how can you not love those cowbells?
My absolute favorite part of the tree! From the fantastically striped pants to the bell on his curly little tail, this just makes me laugh with delight to look at him. I know it seems silly but I just had to share this on my blog and hopefully it'll put a smile on your face today.


Thursday, December 10, 2009

Christmas Packaging

Where does the time go? I can hardly believe that Christmas is almost here and that another year is drawing to a close. I've been taking time each day this week to do a little crafting in preparation for the holidays and I must say, I'm just a wee bit proud of myself for getting my projects done early. Miracles do happen! These two projects were done earlier this week in preparation for tonight's Ladies Fellowship hosted by my church. In the spirit of our current economic times, I've been rooting through all my supplies to utilize what I already have on hand and it's amazing what you can find when you "shop" in your own craft horde.
This project was created with retired Stampin' Up! Designer Series Paper that I had leftover from last year's workshops. Some of you may recognize some retired In Color paper as well (I miss the Baja Breeze paper! sniff...) The felt star was picked up on clearance last year at Rofu Kinderland and are actually German felt table decorations. I apologize for the bad picture but I didn't think to photograph the box until after I'd packaged it up in the bag. Inside is an ornament for our ornament exchange tonight. I wanted some red crinkle filler for inside the bag but I was trying to be good and only use what I already had. The box was created from a template I found on Kelly Lunceford's blog and the design is very similar to a project she featured on there last week. Gotta love CASEing!

I purchased these Chinese takeout boxes while I was in the States last Christmas (10 cents a piece! What a bargain!) and thought it would make a whimsical Christmas package. I removed the handle and pinned the sides together with rhinestone brads. I then hand cut out the poinsettia from white felt and hot glued the petals, ribbon "leaves", and buttons to a felt circle base. The ribbon belly band is hot glued together with the flower hot glued to the top so it can just slide off the top of the box.


I think if I do it again, I would leave the handle on and tie ribbon pieces to the handle and then velcro the belly band together so that it could just be pulled apart to open the box. I have three more boxes so I just might try another one! Thanks for taking a peek at my latest projects :)


Thursday, November 19, 2009

KMC Stampers Group on Yahoo!


Well, I've gone and thrown more fuel on my calendar fire and decided to start a Yahoo group for Stampin' Up! demonstrators located in the Kaiserslautern Military Community. I know this group will ebb and flow as members PCS in and out of the community but I thought it would be nice to have a forum just for demos in our area. I think there are enough of us in the area that if we banded together to support one another, not only would our businesses be more successful but it would be a great way to meet other demos and possibly draw attention to our orphaned group here in Germany from SU! headquarters to get more support for regional training, etc. We'll see how it goes and how much enthusiasm it draws! I'm excited about getting it going and hopefully there will be enough interest that this can become a real means of support for SU! demos in the area.

Sunday, November 8, 2009

Inspire. Create. Share......A lot!

These past few weeks since Joe has returned from Afghanistan have been full, full, full! Enjoying family time, volunteering at the high school, working on various home and crafting projects, and just trying to readjust to having my honey home again have made for a very busy time but all worth it, believe me. With Joe gone for the majority of this year, it made "me" time difficult and Joe has always supported my interests, especially my crafting, because he knows how much it helps to keep me de-stressed with the amount of time he's elsewhere. Well, it was announced in September that U.S. demonstrators stationed with the military overseas were being given the opportunity to attend the first ever European Stampin' Up! Convention and I was just dying to go. It's difficult for U.S. demonstrators overseas not to feel a little estranged from the training and support available to us if we were living in the U.S. (which SU! is improving on all the time so I really shouldn't complain!) so what demonstrator wouldn't want to be a part of a such an amazing event?! Anyway, Joe made sure I paid for my registration as soon as possible and this week was the big event. I am on a euphoric cloud of experience ecstasy and I never want to come down from it!

For those of you not familiar with Stampin' Up!, it was co-founded over 20 years ago by Shelli Gardner and her sister, Vonna. I'm pictured here with Shelli Gardner (eek!), who is as sweet and lovely in person as she is in every photo I've ever seen of her. The European Convention was a PHENOMENAL experience and one that I'm so glad I was there to witness.


Called Paper, Pad, and Marker, this ice breaker event helped me to jump right into the flow of things and start talking to ladies while I made a helpful tool to use in workshops. I was welcomed to the room by none other than Pam Morgan, our Vice President of Demonstrator Relations, who asked for my information to possibly set up an event at Ramstein for military demos living overseas!! I hope that comes to fruition because I am beyond excited that we could have an event for our group.


I met many lovely, friendly women from France, Germany, Great Britain, and Scotland. (Pictured here is a group photo of the demos from the UK) It was amazing to see how the love for crafting and stamping brought all these women together, sharing ideas, inspiring each other, and making new friends. It was a momentous occasion and probably did more to promote international awareness and peace than any meeting of the U.N. has ever done. Maybe if we all got together and crafted, the world would be a more peaceful place :) I felt a little out of place at first since there were only a handful of U.S. demos attending but that didn't last for long as ladies allowed me to sit with them and were welcoming and friendly. One of the things that touched me the most was how many ladies shared swaps with me, even though I didn't have the time to make any before going to convention. I have many, many photos of projects to share but it will take me several days to get them all in order so I'll just past a few for now and then post more as the week progresses. Here's just a few highlights:


What a lovely way to present a box of sweets! Each flower was so detailed and could be a card embellishment all by itself.


One of the highlights of convention is the number of samples available for viewing. How can you not be inspired after viewing so many beautiful cards, scrapbook pages, and 3-D projects?


This paper is no longer available in the U.S. Stampin' Up! catalog but it's still one of my favorite papers. The colors are so bold and what a delightful color combination.


This is a PAPER birdcage! Can you say WOW!! Talk about vision and creativity to create something so intricate. It certainly surpasses anything I've ever thought of creating. I have oodles of photos to share but wanted to share just a few to get you drooling for more. I'm so thankful that I have a husband who is willing to support trips like this to re-charge my creative batteries and enjoy the things that interest me. And I'm beyond thrilled that Stampin' Up! so generously gave me the opportunity to be there for such an exciting event.
Keep on the lookout for more photos this week!


Monday, November 2, 2009

Kreativ-Welt Wiesbaden


This past weekend was the first time I've ever had the opportunity to attend the Kreativ-Welt craft fair in Wiesbaden even though I lived there for three years and I was absolutely AMAZED at the event. It was very well organized and featured almost every kind of craft imaginable: fiber crafting, scrapbooking, rubber stamping, floral arrangements, jewelry making and beading, ceramics, home decor, quilting, felting, sewing, wood working....two floors of crafting goodness right at your fingertips! Of course, I primarily went for the paper crafts but the creative juices were stirred at the variety of other crafts represented. (European flower arranging vendors really sucked me in!) Even IKEA was there, featuring easy and inexpensive projects for decorating your home. I was rather surprised that Stampin' Up! didn't have a booth there since they are trying to build such a strong presence in Europe but Creative Memories had a booth for signing on European consultants, which I wasn't even aware that they were trying to tap into the market here. What's difficult living overseas is the distance between crafting stores, what is offered, and of course, the expense of shopping in euros. In the States you can find a Michael's, JoAnn, Hobby Lobby, etc. in almost every major city as well as a few privately owned paper crafting stores but mega stores like that are just not part of mainstream European shopping. In a way, I think they should be just because there's such a desire for crafting products overseas...much evidenced by the number of shoppers at the Kreativ-Welt over the weekend. People actually brought large rolling shopping bags! There were a couple of products that I purchased which would surely be less expensive purchasing through a website in the U.S. but were things I had never seen demo'd and decided the extra cost of purchasing them here was rather gratuitous since it meant that I wouldn't have to wait! The biggest product I wanted to try was Glimmer Mist, a liquid spray which leaves a lovely metallic sheen on your papers and is perfect for distressing. Got a couple of bottles to try for Christmas projects and perhaps I'll have something to show on my blog later. I apologize I don't have any tantalizing pics to show of the event but I had a brain cramp and forgot to bring my camera. Anyway, it's something to look into attending next year if you're living overseas...well worth going to if you're interested in many different kinds of crafts. We had a great time at this event and even the kids got to purchase a few items. Alex put together her own ribbon necklace and Jordan got us hooked on a wooden table-top fussball type game with magnetic figures that we ended up purchasing for home. Of course, I had to bribe Joe with Sushi World to get him to go but he even admitted to enjoying it more than he thought he would. A good way to spend the weekend, I'd say!

Friday, October 16, 2009

Technique Club Project

I did this project today from start to finish and am so proud of myself that I thought I'd post it. Sorry for the terrible lighting but I didn't feel like setting up the light tent and the weather outside is rather dismal for an outdoor photo. I'm sure you get the gist of the project! I'm starting a new Stampin' Up! Technique Club this coming Sunday and this is a variation of the project we will be doing for the first meeting. The idea is to present two or three techniques each meeting for six months, with technique "recipe" cards to go along with the projects. By the end of the six months each club member should have 10 to 12 new techniques for crafting/stamping projects. The box will hold all the technique "recipes", which they can keep on their craft desk to pull from when they need some inspiration. I often create sketches of the projects I'm working on, with dimensions and tips written down as I go. Now I can pull a card from my technique box and sketch my projects, then place them in the box for safekeeping when I'm done!
What a surprise that I used my signature colors to make this project! (not!) I'm preening from my resourcefulness in creating this lovely embellishment. Inspired by Heather Bailey, a fabric designer and inventor, I decided to create my own fabric flower embellishment for the top of the box and I love how it turned out. The fabric is recycled from a pair of curtains I had in my last apartment, plus felt pieces leftover from previous felt projects, a scrap of satin Stampin' Up! ribbon, and a button re-purposed from a stash that came from a tin of buttons that I played with as a child that I believe were my great-grandmother's buttons.
The box purchased for the project contains a heavy duty chipboard egg holder that I trimmed down and covered with matching cardstock. The original project by Nicole Heady uses a piece of foam core board but since that's not an item easily found in Germany, I decided to use the egg insert instead of tossing it. By leaving on the short side flaps, the insert stays upright without having to glue it into the box and gives you the option of moving the insert back and forth


I painted the outside of the box with black acrylic paint, allowed it to dry (about 10 or 15 minutes, which was really fast!), glued the paper to the box with the Mod Podge and then I applied a layer of matte Mod Podge on the outside of the box. I've never used Mod Podge, which is a clear sealer, and it really leaves the project looking professionally finished. Plus if you decide to use this as a recipe box, it protects the outside of the box from spatters. I hope you enjoyed my latest project!


Sunday, August 16, 2009

Where'd the time go?

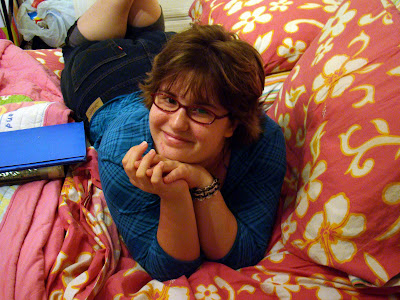
I can't believe I've neglected my blog this long! I have craft giveaways to post, projects to feature and I STILL haven't put any photos on here of our trip to Belgium. We have since been back to Belgium for family camp so there's even more photos from that, the summer is drawing to a close, and now I'm looking at this candid photo I snapped of Alex, wondering, "Where'd the time go?" Well, I can't worry about where the time has gone but I can make the most of what's to come so here's a few highlights:

*First, I'd like to say a big THANK YOU to the ladies who posted their top ten encouraging things on my last post. I was so encouraged by the things you wrote! It's so easy to focus on the negative in life, something that I've made into a very bad habit. For anyone who didn't participate and you have no idea what I'm talking about, go to the posting prior to this one and click on "comments" just below the post. You'll be greatly encouraged just by reading the comments. Since you ladies have been so patient about waiting to see who won the drawing, I've decided to just go ahead and give each of you a prize. Sometimes it pays when I'm forgetful :) So, Kerry, Tasha, Diane, Jennifer, and Heather, I'll be in touch with each of you about your prize and the best way to get it to you. Thanks for playing along with my challenge!

*The first week of October I will be hosting a Christmas swap, with the location to be determined. I'm looking at a couple of locations, one of which might entail a small fee for each person participating in the swap. Be on the lookout for an Evite from me with all the details but go ahead and reserve the first Saturday in October for the swap. (I know, for those of us who are local it's Homburg flea market day but surely you can make it to the swap after shopping!)

*Lastly, is anyone in Ramstein looking to join a stamp club? I'm starting two new technique clubs in September, one hosted on the first Tuesday of each month and the other to be hosted on the third Sunday. Both are a six month commitment, with a $25.00 minimum order each month, and will feature two techniques per month with a technique box created in the first meeting to house all your new ideas. I've got a little bit of space in each one so let me know if you're interested!

This isn't a terribly exciting post so thanks for subjecting yourself to all my announcements. Hopefully I'll have some pics and projects for you this week. Until next time!

Monday, July 27, 2009

To Spiral Up or Down? That is the question....

In perusing photos from past trips, I found this terrific photo I took of the spiral staircase in the Vatican Museum which got me thinking about my latest downward spiral into the summer doldrums. How can one have summer doldrums? Well, we've had weird, ookie (that is a technical term...honest!) weather this summer, the hubby is still gone, and I have also been location bound for far too long. You see, I'm a wanderer: I love to travel and see new things. My father warned my husband shortly after getting married that I have always been a busy, on-the-go type person and that he'd better get used to it. Joe hasn't always embraced this part of my personality but for the most part, he goes along with it. If nothing else, it has proven to be a blessing for a family that moves a lot! Getting back to my downward spiral, I find that I get a little depressed if I can't get out and DO things, like travel. Between Alex's summer job, Jordan's summer enrichment program, and now dealing with the aftermath of Jordan's surgery, it has been difficult for us to get out and about for the past few weeks. Don't get me wrong: I don't begrudge the kids the opportunities they've had this summer and I'm thankful that Jordan's surgery has been a success but I'm starting to get a little stir crazy! I said all that to say that I decided to keep on the positive side and create a list of ten things that make me happy (not in order of importance):
1. Cows! Mooooooo!
2. My children
3. Grape Bubble Yum
4. Upcoming Family Camp in Belgium (travel! yippee)
5. Jokes
6. Living in Europe
7. Joy in knowing that God never gives up on me, despite myself
8. A wonderful, sexy, fantabulous husband who loves me, despite myself :)
9. Chasing Mr. Bubbles around the coffee table (Bubbles is a West Highland terrier owned by Alex's clarinet instructor...he occasionally enjoys sticking his face up into the bell of Alex's clarinet while she is playing. What a hoot!)
10. The friends and family who have encouraged me while Joe is gone
How can I not feel better after compiling this list? So I've elected to "spiral up" instead of down and be thankful. To spread the wealth of happiness, I've decided to have a few giveaways this week! Free crafting goodies will make all the crafters in my life happy, right? So here's what you need to do: respond to this post (click on the word "comments" directly below this post) and in your post, I want you to give me a list of the ten things that make you happy. All comments need to be posted on my blog by this coming Friday, July 31st. On August 1st, Joe will have been gone for four months so beginning that day I will draw one winner each day for four days. Think how much better you'll feel for writing down your list of "happy things" and know that you might win free crafting goodies at the same time! For you non-crafters, if you want to play along, I'd love to read about your ten happy things as well. Hope to see your posts soon!

Milk Made with Pizazz!

Being a cow fan, I couldn't resist ordering Lauren Meader's latest Papertrey Ink. Timeless Template called "Milk Made". How can you not love this adorable carrier and matching milk cartons? Combine this terrific template with Stampin' Up!'s new In Color papers and you just can't deny the cuteness factor. Hopefully my Sunday Stamp Club enjoyed this project yesterday because there is alot of cutting and scoring but I think the finished product makes it all worthwhile. If you're interested in purchasing the template for this project, visit Papertrey Ink.'s website for information on how to download instructions. For $5.00, you receive 18 color pages of design information, plus template download information for both large and small size cartons and carriers. You can find even more template ideas by visiting Lauren's blog. Thanks for checking out my latest posting!
Supplies: SU! Petal Pizzaz stamps, SU! Razzleberry Lemonade DSP, SU! Mambo Melon, Crushed Curry and Whisper White cardstock, SU! Mambo Melon, Crushed Curry, and Rich Razzleberry Classic Ink, SU! Crushed Curry polka dot grosgrain ribbon, SU! Scallop Circle, 1 3/8" and Scallop Border punches, Marvy Uchida Super Jumbo and Giga Circle and Scallop circle punches, pink cotton twine, dimensionals, Scor-Tape, Scor-Pal, Crop-A-Dile, piercing tool, SU! rhinestone brads, SU! vellum cardstock

Sunday, July 19, 2009

Blogging for Therapy

It's 4 a.m. and I'm supposed to be sleeping but sleep seems to be far off in the distance so I'm parked in front of the computer, as usual. My new goal is to shut the computer off at night so that I'm not tempted to check e-mail and browse Facebook, thereby getting sucked into a vortex of "time death" whereby my day is wasted playing frivolous games like "Farmville". Of course, I forgot to shut the computer off last night so where do I drift when I'm awakened at 0'dark thirty by an unhappy tummy? The computer, of course. Anyway, I attempted to utilize my time wisely by sorting through photos from our trip to Belgium to post here for family and the hubby to view when I decided to browse my list of blogs that inspire me. Recently, a designer named Christine Middlecamp was featured as a guest designer on Ali Edwards blog and I was so inspired by the featured project, I bookmarked her blog for future viewing and this morning seemed to be the perfect time to do so. As I was reading through her blog, I was stunned to learn that Christine lost her husband to cancer last year and is raising her son alone. I was partly moved because Joe's Aunt Jinger is currently battling cancer but also because Christine is raising a son who is just a few years old...just a little guy. Her story and courage really touched me. The artwork featured on her blog is so bright and bubbly and inspiring that it made me want to craft and create and visit my own meager little blog to make it better. So then I'm back to loading photos like a good girl when suddenly I look at the above photo and start bawling. Yes, bawling! It hit me that we had taken this wonderful trip to Belgium only Joe wasn't with us and how I'm often just as alone in raising my children as the designer whose husband died. (I'm sorry if this is too intense for a blog posting so feel free to click elsewhere to a happier place on the Internet.) While writing and crafting are sources of therapy for me, sometimes the best thing is to just break down and have a good cry! I try so hard to be strong for Joe, for the kids, for the people in my life who need me that I forget that it is okay NOT to be Super-Mom, Super-Wife, Super-Person and end up bawling in front of my computer like I am now. I guess I feel like I shouldn't grieve so deeply for my missing husband when I live such a blessed life. Since Joe has been deployed I've been stunned by the number of people who have come out of the woodwork, so to speak, to encourage me so I guess I feel guilty for breaking down. Cards, phone calls, e-mail, invitations to lunch or game night: all have been plentiful and such an encouragement. Joe's aunt is fighting for her life and I'm crying because Joe couldn't be here for a family trip! Seems silly and trivial when viewed from that perspective, doesn't it? Anyway, I know it's okay for me to cry and perhaps it will help me to have more empathy and compassion for others when they struggle through the challenges of life. Well, I guess I should end my blogging therapy here and attempt to get more sleep. If not, I'll probably see you around Facebook :)

Thursday, July 9, 2009

Altered Notepad Tutorial!

During this week's Tuesday Stamp club we worked on two projects, the first of which is this altered notepad. Tasha Enderby presented a similar project at a demo meeting last year (a very cute project, I might add) and then I was once again checking out Angi Juda's site and found a video tutorial for this project that was slightly different from the one Tasha presented. I thought I'd combine the best of both! While you can see an excellent video tutorial on Chic'N Scratch, I'm going to try to create my own step-by-step pictorial. Have some patience as you view the photos as the lighting at my craft desk is horrible!
Here's a close-up of the top of the pad. Simple but pretty!

For the local folks, POPS printing on Ramstein Air Base will cut legal size pads for you, with three long pads possible from one large pad. I paid $1.50 to have five pads cut (it's 50 cents a cut but they were able to stack all five together and cut them in just three cuts. That comes out to 10 cents a pad for 15 notepads...not bad!) If they're not busy, they'll cut them while you wait. POPS is located in the 435th Services building across from Mom's Video. Okay, for the rest of you folks, you can visit your local mom and pop printing place or Staples/OfficeMax and they should be able to cut them as well. I had them cut to 3" x10" so I could fit the background piece from a standard 8 1/2 x 11" piece of cardstock.


Cut your notepad base to 3 1/2" x 10 1/2" and randomly stamp your background image along the edges. I used the new In Color Rich Razzleberry Stampin' Up! cardstock for the base with matching ink for a tone-on-tone look; sponge edges if desired and set the base piece aside.


Cut your color layer 2 3/4" by 1 3/4" and the white layer 2 1/2" x 1 1/2". Adhere the back of the white layer and apply to the color layer. Adhere a piece of 3/4" x 1 1/2" Designer Series Paper to one side of the white layer. Center and stamp your sentiment on the white layer; set aside.


Cut cardstock 3" x 4 1/4": score at 2" and 2 1/4". Fold along score lines to make foldover piece for top of notepad.


Apply dimensionals to the back of the previously layered piece and adhere to foldover base.


Apply Scor-tape or Sticky Strip to top backside of notepad and the front top strip of the notepad. Remove backing and carefully apply the foldover piece. Do not adhere foldover piece in front to the notepaper! Only apply Scor-tape to the top strip of the notepad so you can still rip your notepaper off the pad when your project is finished.


Once the foldover piece is adhered to the notepad, apply long strips of Scor-Tape to the back of the notepad as shown. Removed the adhesive backing, center the notepad over the base, and adhere to the cardstock base.


Voila! Your notepad is nicely secured to the base and now you're ready for some added embellishment.


I I stamped a coordinating butterfly from the Great Friend stamp set, trimmed the excess cardstock from the edges and applied the image to the front of the notepad with a dimensional. A dimensional pearl from the SU! Pretties kit was adhered with a mini glue dot. Simple and easy! Thanks for patiently going through each step. Please let me know what you thought of my maiden tutorial voyage...suggestions are always welcome! Happy crafting!


Wednesday, July 8, 2009

So Tweet and the latest happenings

I know I promised to post pics from my trip to Belgium but I haven't quite found the time to weed through them all. Tomorrow is sort of a "Home Day" for me, with no appointments in the afternoon, so maybe I can squeeze in some crafting and blog updating. We've already decided to make breakfast for dinner, pull out the bed in the couch, and have breakfast in bed for dinner. Yippee! Anyway, I thought I'd post some random things since they were on my mind. I'll start with a project first. Isn't this a tweet, I mean sweet, card?! Once again inspired by Angi Juda's site, I CASE'd this idea for a workshop I did the last week of June. Very simple design and easy to put together. Sometimes it's nice to have a project that's quick, just to experience a quick jolt of satisfaction at having completed a project.
Here's a peek at the inside. I just love the SU! Cheep Talk stamp set with its pudgy little birdie.


July 3rd was an absolutely crazy day weatherwise! I had attempted to put together a weekend trip to Paris and so many things seemed to bar the way that perhaps it was a hint to cancel the trip. After the storm subsided on Friday, I was glad that I was not out traveling in such horrendous weather. The day started off well enough, with sunshine but a smattering of cloud cover and LOTS of humidity. As the day progressed this dark, ominous cloud formation appeared on the horizon and next thing I know, we're being pelted by heavy downpour that turns into hail. That's right, HAIL...in July!!!! I've lived in Germany for many years and this is the first time I remember a hailstorm in the middle of summer. I don't know if you can spot the hail pellets scattered over my yard but the above photo is taken from my office window after the hail had subsided. My poor plants took a beating!


When the storm began, I opened the window to the office to watch the rain and a butterfly fluttered over to the window and almost flew into the house! It was a breathtaking moment to watch this beautiful butterfly fluttering under the eave of the house, looking for a refuge from the storm and watching to see if it was going to fly into the house or stay outside. Instead it took cover from the storm just outside the window and stayed for quite some time. There's a life lesson in there somewhere but I'm still pondering on it. Thankfully the yucky weather passed on and we had a gorgeous 4th of July.


I was on Skype with Joe today and looked over to see Alex asleep in her chair. She was helping Jordan play a game on her computer and at some point, she fell asleep. Eventually he left to play Legos in his room but she remained, just snoozing away. I'm sure she'll be happy to see I've posted this on my blog! Hee, hee...evil mommy laughter.....


Recently I purchased a letter "A" on Etsy for the space above my craft desk and it finally came in last week. I love it! I had actually planned to put it in the space above the punches but it didn't look right so I moved the clock above the door and put the stamp quote and a moo card above the punches and put the letter where the clock used to hang. I also added another kitchen bar from Ikea since I've expanded my inventory of punches. The space where the letter hangs still seems a little bare but I'm just happy to have the space organized a bit better until I can figure out what I want to do differently. I know, having a giant letter "A" on the wall is not the most exciting thing that can happen in life but for some reason the pretty font and bright red color makes me happy. We all need a bit of whimsy in life from time to time!
So, I guess that's the end of today's random musings. Lately I've been spending time on other artist's blogs and feeling that my blog leaves something to be desired. Do I change to Typepad or stay with Blogger? How much more time can I spend crafting so I have more exciting projects on my blog that will entice folks to check it out or does it really matter to me? Where do I need to rearrange things in my life that will bring it into better balance with things that REALLY matter to me, like my family and my relationship with God? Can I make it through another three months of deployment? Just stuff I've been thinking about lately. Probably not interesting for anyone reading this but it sure is therapeutic just to write about it! So, off to bed and a little time reading a new devotion book for Bible study on Friday. Until next time!


Saturday, June 27, 2009

Hanging out at the Seewoog

We were extremely blessed when we moved from Wiesbaden to the Ramstein area two years ago to have the opportunity to rent a house in the village of Miesenbach. Not only is it close to the base, we're also close to a good church, and have easy access to a major autobahn for travel. But the neighborhood itself is nice, with a small local lake and some delightful restaurants nearby. Germans really enjoy outdoor activities like hiking, biking, or walking through cultivated gardens so the area around the Seewoog (lake) in our village is well-maintained. Next to the lake is a small imbiss for snacks, a playground, an open grassy area for picnics or a game of soccer, and a picnic table area with a BBQ pit. There are some nice trails around and above the lake that a local hiking club manages. A couple of weeks ago we had some friends over for a BBQ and after gorging ourselves on yummy food, we opted to walk some of it off by heading to the Seewoog.
The terribly strenuous (not!) ten minute walk to the lake meant we had to reward the kids with some fun time at the playground.


Here's Jordan and our friend Taylor enjoying time together.


I managed to get all the kids to sit down for a cheesy moment in front of the foliage growing around the lake. They were more interested in playing at the playground than posing for photos but they humored me! Thanks for checking out our excursion to the Seewoog.


Thursday, June 25, 2009

Belgium and stuff

I can't believe how long it has been since I posted something on my blog! The end of May and first two weeks of June had me tearing my hair out trying to keep up with all the end-of-the-school-year hoopla and fighting to keep my sanity. I managed to survive all of that just to have a fresh bout of busy-ness ensue and now I'm brain-dead, trying to remember everything I've done in the past few weeks. Oy! I'll start with what's freshest in my mind, which is our five day trip to Belgium last week. Woot, woot! We had a wonderful time getting away from it all and exploring the sights, sounds and yummy tastes of Belgium. I'm not big on Belgian pralines as the filling usually contains ground hazelnuts but the sampling I had of Belgian chocolates during our stay made me glad I don't live there since I'd be 500 pounds. My favorite was a milk chocolate truffle filled with fleur-de-sel creme caramel. I definitely did the happy dance after eating this delightful morsel! Anyhoo, I'm not quite ready to post the bajillion photos I took on our trip so I thought I'd put a teaser out there for my crafting crowd and show off the goodies I picked up at a flea market outside of St. Jakob's Kerk in Ghent. Buttons, cotton cording, and fabric tags were fun to pick up at a stand selling notions but my favorite vendor had nothing but vintage brochures, books, paper, letters, and postcards. I'm always delighted to scrounge through paper! The postcards I purchased are perfect for some of the scrapbook layouts I'm planning for previous trips to Rome, Paris, and now Belgium. Alright, I'm getting long-winded about the craft supplies so I'll end here but keep a lookout for more pics of our trip in the coming week.

Number of cows visiting my pasture...

LinkWithin

Related Posts with Thumbnails